
Complete the following forms to edit accounts:
Enter an Account # or different portions of an account using question mark logic.
Select All, Active or Inactive from the DPI Active/Inactive dropdown list.
Click Refresh or press Enter on your keyboard.
o All accounts matching the search criteria are displayed.
o Blanks are treated as a question mark.
This grid will load empty. Once an account # (or part of an account code) is entered above, the grid will display a list of accounts.
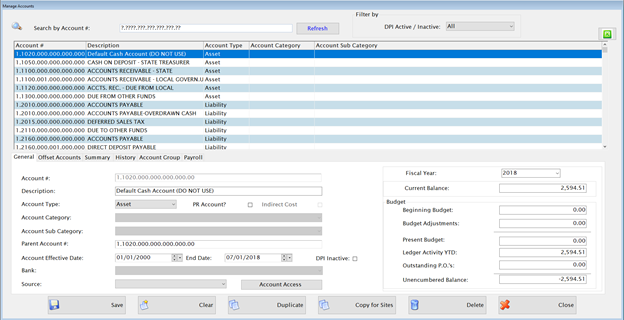
Click an Account from the upper grid to edit it and the fields will display the previously entered information. Update any necessary information in the appropriate fields.
Click Clear to enter a new account.
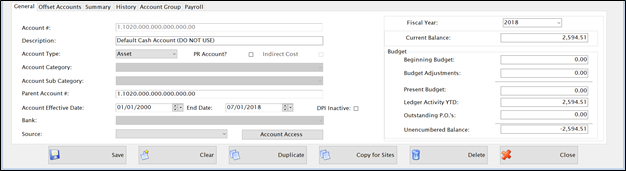
Enter the account # in the Account # text field. This is automatically formatted based on the Account Structure defined in the Control File.
Enter the description for this account in the Description field.
Select Asset, Liability, Expense, Revenue, Reserve or Trust from the Account Type dropdown list.
Check the PR Account? box if this is a Payroll account. If checked, it will be available for use in LINQ Payroll and will give a warning if the account is used for a requisition in Fund Management.
Select an Account Category and Account Sub Category from the Account Category/Sub Category dropdown lists, if desired. These may be used for headings in financial reports.
The Parent Account field displays the account # that holds the budget for this account. By default it is set to the account number. You can enter a different account number here if you want to group accounts for budgeting purposes.
Enter the Effective Date and End Date in the date fields. By default, Effective Date is 01/01/2000 and End Date is 6/30/2099.
If DPI makes the account code inactive, the check box beside DPI Inactive will be checked. This field is regulated by DPI and cannot be changed by any user.
Select a Bank from the Bank dropdown list. This is used to associate a cash account with a bank account.
o The account must be an Asset and the Account Number must match its Cash offset. This field is not used for non-cash accounts.
Select a Source that has been defined in Account Source Setup from the Source dropdown list, if desired. This is usually used for Revenue accounts only.
Budget Info Panel (Right-Hand Side)
The Current Budget amount will display.
The summarized budget information for this account will display.
DUPLICATE BUTTON
 if you want to duplicate an existing account. It copies the information from the original account to the screen. You just need to change the account number and anything else that needs to be different for the new account.
Click  if you want the option to create the same account for multiple sites for an existing account. The Copy for Sites button will only show on existing accounts.
NOTE:If an account has been inactivated by DPI, it will display informational text as noted below. The end date of the account will be set to a past date (account is considered expired). If the account is DPI inactive, you will not able to modify the account in any way.

Click Save.
o If the location element of the new account = 000 and the object code is between 400-499 or if it’s marked as a Payroll Account, you will be asked if you want to create this account for multiple sites.
Click No to add the new account like normal.
Click Yes to create the account for different sites. A new screen will appear.
Object Code between 400-499
o If the Object Code is between 400-499, you will receive the following screen:
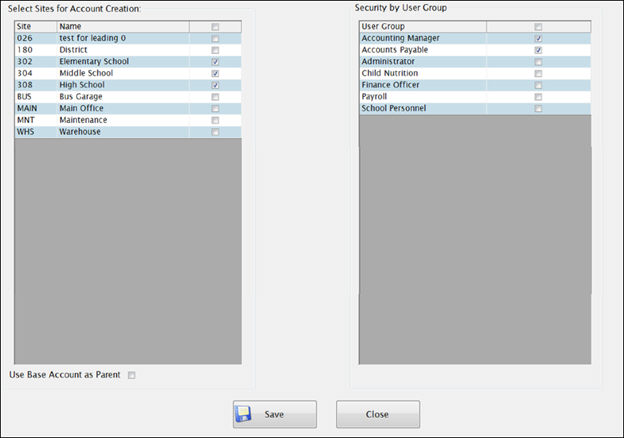
§ The left grid has a list of all your Sites from System Management. Check any Sites you wish to generate this new account code for. Site =000 in the original account will be replaced with the site number selected.
§ Under the left grid, there is the option of making the Base Account the parent account for all the new accounts created from the sites selected. The Base Account is the original account added with Site = 000. If you do not check this box, the new account and parent account will equal each other.
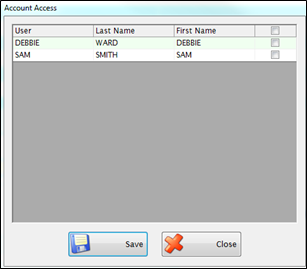
§ The right grid lists all of the User Groups from System Management. Select any user group you want to have access to the newly created accounts. It will only give a user access to the new account if they belong to the user group(s) selected AND have site access to the site used in the account.
Example: If you select the user group containing your bookkeepers, the individual users will only be given access to the new accounts belonging to the sites in which they currently have access for. So the bookkeeper at Site = 302 will only receive the accounts created for Site 302, even though you may have selected to create accounts for sites 302, 304, 310, & 312.
Click Save and all the new accounts will be generated and account security will be assigned.
Payroll Account
o If the account is marked as a Payroll Account, you will receive the following screen:
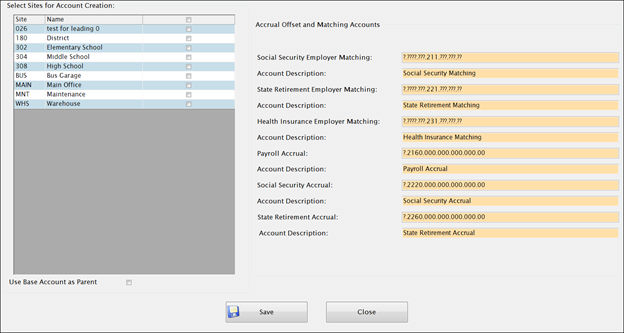
§ The left you have a list of all your Sites from System Management. Check any Sites you wish to generate this new account code for. Site =000 in the original account will be replaced with the site number selected.
§ Under the left grid, there is the option of making the Base Account the parent account for all the new accounts created from the sites selected. The Base Account is the original account added with Site = 000. If you do not check this box, the new account and parent account will equal each other.
§ The right grid displays the Matching Accounts and Accrual Offset Accounts that will begenerated when the new account is added. It defaults the templates for the Matching Accounts from Payroll: Deductions and the templates for the Accrual Offsets from the Fund Management: Administration: Control File. You CAN override the defaults as needed.
Example: If adding a Fund 3 account you may need to update the PRC =??? for the accrual account templates). You can also change any descriptions as needed.
Click Save and all the new accounts, including the Matching and Accrual accounts, will be created.
Offset Accounts Tab
The Offset Accounts Tab displays the offset accounts to be used with standard journal entries for this account.
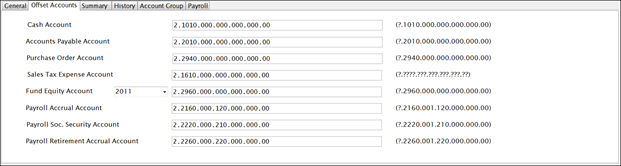
When you save changes to an account, it will give a warning if the offset accounts do not match the offset templates in the Control File; however, it will allow a non-standard offset to be used as long as the FUND matches.
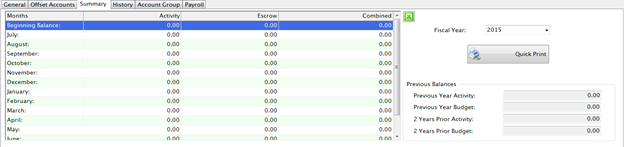
Summary Tab
The Summary tab displays a summary of each month’s activity for this account and the beginning and ending balances for the selected fiscal year.
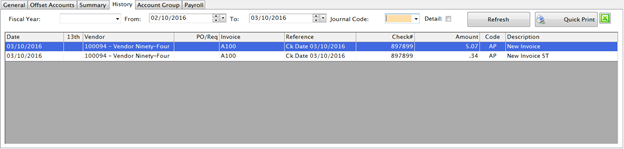
History Tab
The History tab displays the history for this account for any fiscal year or date range.
Select a fiscal year from the Fiscal Year dropdown list; or
Enter a date range in the From and To fields.
Select a Journal Code from the Journal Code dropdown list.
o Journal Codes abbreviations are:
§ AJ = Adjusting Journal Entry from Transactions
§ AP = Accounts Payable from Invoice Accrual
§ BB = Beginning Budget from Beginning Budget Setup
§ BG = Beginning Balance Adjustment from Beginning Balance Adjustments
§ BJ = Budget Adjustment from Transactions
§ CD = Cash Disbursement from Process Payments
§ CN = Child Nutrition
§ CR = Cash Receipts from Manage Deposits
§ EJ = Encumbrance Journal Entry from Transactions
§ ES = Escrow
§ PO = Purchase Order
§ PR = Payroll
§ RQ = Requisition
§ WH = Warehouse
Check the Detail box if you want to expand the history to see more details of the transactions.
Click to Quick Print if you want to print a list of the history. A preview report will display where you can make your printer selection.
Clicking the green Excel button will open a worksheet in Excel with whatever is displayed in the grid.
Account GroupTab
The Account Group tab displays all the accounts that share the same Parent Account. These accounts are linked for budgeting.

Select a fiscal year from the Fiscal Year dropdown list.
Click to Quick Print if you want to print a list of the history. A preview report will display where you can make your printer selection.
Clicking the green Excel button will open a worksheet in Excel with whatever is displayed in the grid for that fiscal year.
©2019 EMS LINQ, Inc.
Fund Management, revised 03/2019