Deposits
Once you have entered cash receipts in Manage Receipts, the next step is to create and post deposits in Manage Deposits. A deposit can be created from any number of open receipts from a single bank account.
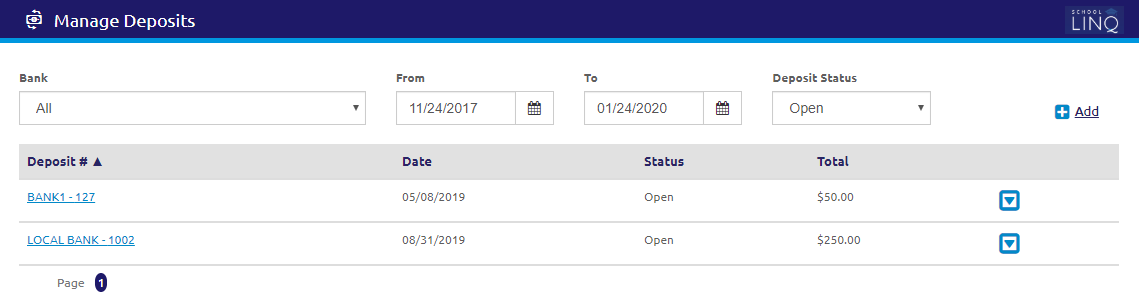
Search and Edit
- Select a bank from the Bank drop-down list.
- Enter or select a date range using the Calendar feature in the From and To fields.
- Select a status from the Deposit Status drop-down list.
- Open deposits have been saved but not deposited and can still be edited.
- Closed deposits have already been processed.
- Cleared deposits have been paid in full and cleared the bank.
- Voided deposits have been voided and payment has been returned to the customer.
- To view or edit an existing deposit, click the
 icon.
icon.

- Click the
 button to view the deposit details, or click the link in the Deposit # column. The Edit / View Deposit form will display.
- To remove a receipt from an open deposit,
uncheck the
 boxes of the Receipts that need to be removed from the deposit.
 - Click the
 button to post the deposit, or click the
  button to leave the deposit open.
- To remove a receipt from an open deposit,
uncheck the
- Click the
 link to delete the deposit.
 - Click the
 link to print and post the deposit. A deposit preview window will display.
- Clicking the
 button on the deposit preview window will generate a message box to confirm if the deposit printed/processed correctly.
 - Clicking the
.png) button will complete the posting of the deposit.
button will complete the posting of the deposit. - Clicking the
 button will NOT post the deposit, and it will remain in an open status.
 - Once the deposit has been printed and posted, the
 link will display allowing users to reprint the deposit.
- Clicking the
Create New Deposit
- Click the
.png) link. The Create New Deposit form will display.
link. The Create New Deposit form will display.
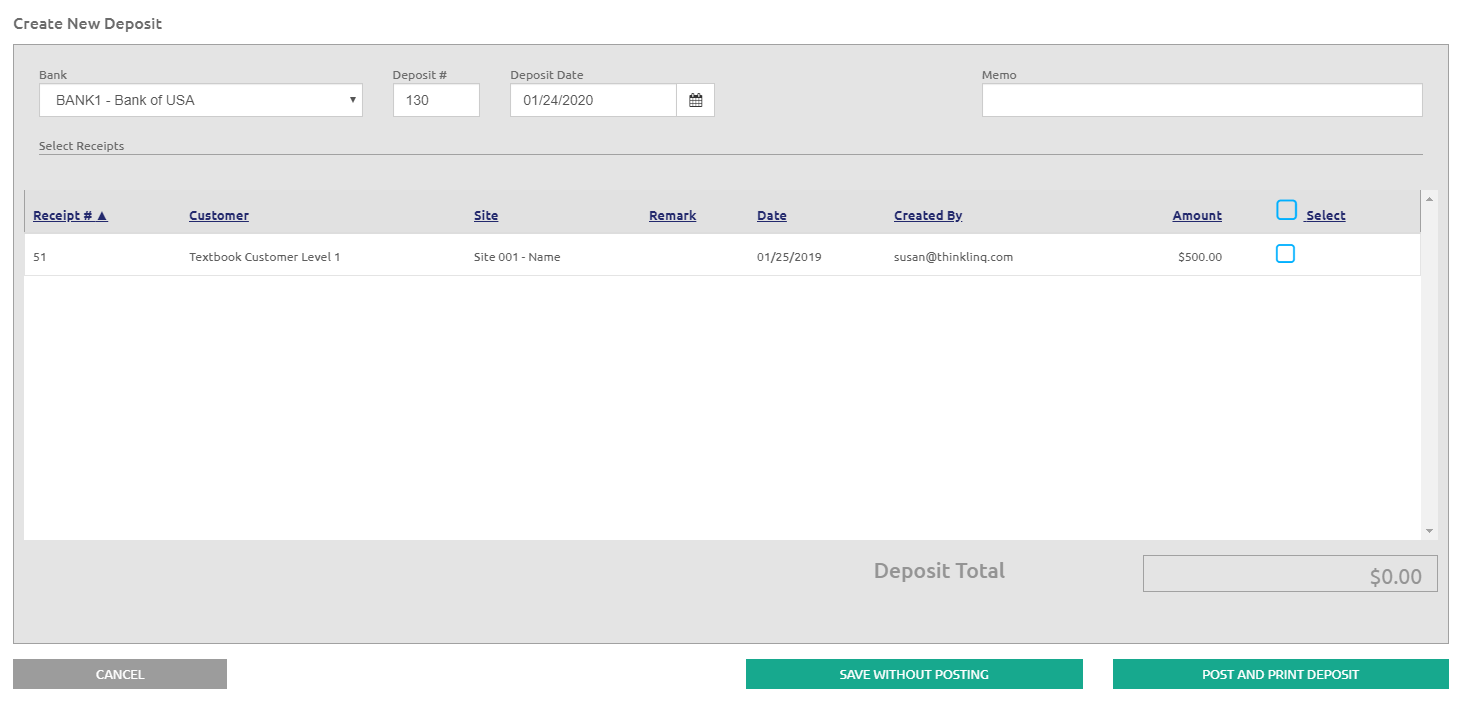
- Select a bank from the Bank drop-down list.
-
The Deposit Date will populate to today's date and display the next Deposit #, but these fields are editable.
-
Enter a memo in the Memo field. This is optional.
-
Check the
boxes to select the Receipts to be included in this deposit, or check the Select box to select all.
- Click the button to post the deposit immediately. This
posts the deposit to the account balances and bank reconciliation.
- A preview of the deposit ticket will be displayed.
- Use the printer icon at the top left to print it out.
- Click the button to save the record as an Open deposit. An open deposit can still be edited.
Void Deposit
- Select Closed from the Deposit Status drop-down list.
- Click the icon next to the deposit to void.
- Click the
 link. A Void Deposit window will display.
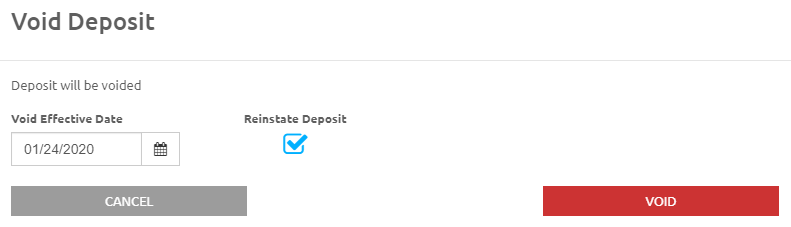
- The Void Effective Date will populate to today's date, but this is editable.
- Check the Reinstate Deposit box to recreate all the receipts tied to the deposit, and the next available deposit number will be assigned to them. This is optional.
- Click the
 button. A confirmation message will display.
©2021 | EMS LINQ, Inc.
School LINQ Help, updated 01/2021