Absences
Input Absences allows users to enter employee absences. This information is used to update leave balances and calculate pay deductions for absences. You may attach a sub to an absence record, if applicable.
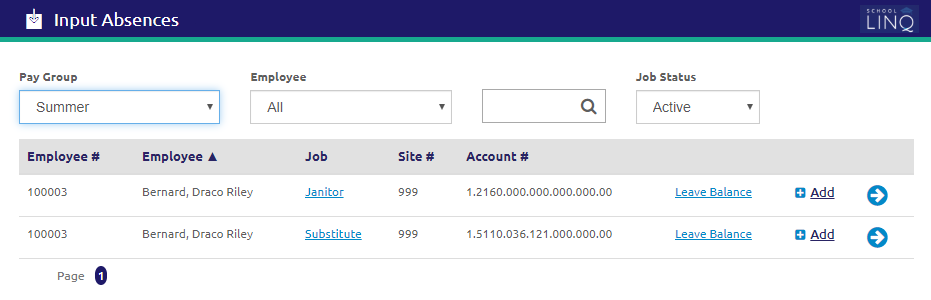
- Records are primarily filtered by selecting a pay group from the Pay Group drop-down list. All employees from that Pay Group will display in the grid.
- Select an employee from the Employee drop-down list.
- Enter an employee name in the
 field to search for an employee.
 - Select a status from the Job Status drop-down list. Active is selected by default.
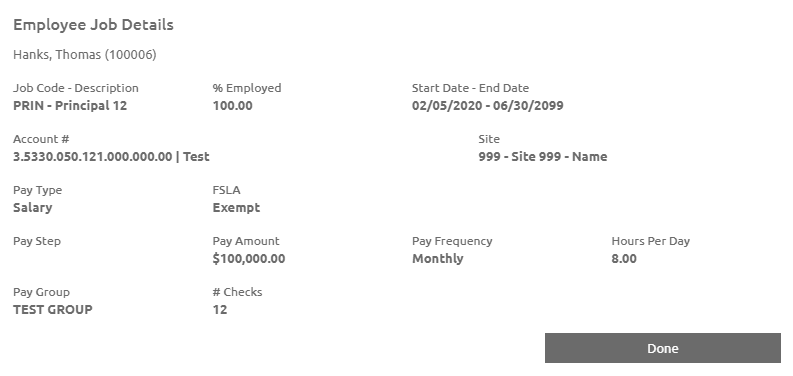
- To view details about any employee job, click a Job link. Employee Job Details will display.
- Click the
.png) button.
button.
- Click the
- To view current leave balances, click the
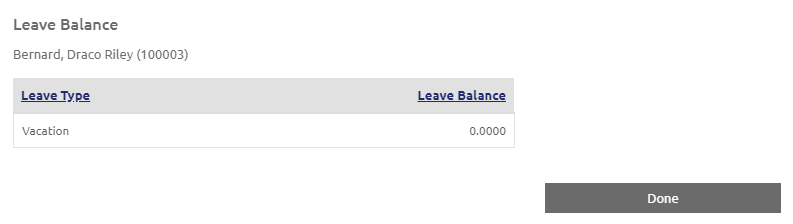
 link. This is updated instantly as absences are entered or deleted.
- Click the button.
- Click the
- To view, delete, or add absences for an existing employee, click the
 icon. Employee absences will display.
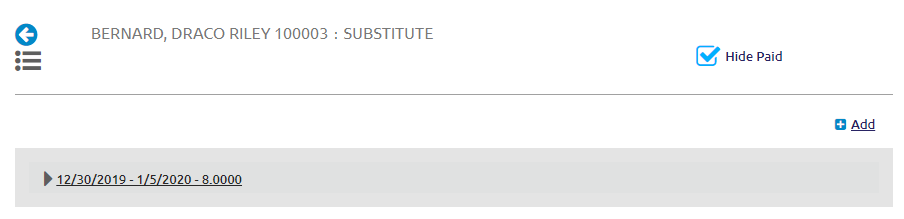
View and Delete Hours
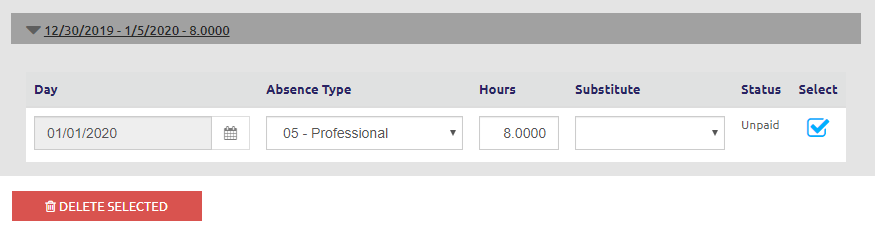
- Uncheck the Hide Paid box to view all absences paid entries to an employee.
- Click an entry to see additional details about the absences paid.

- To delete absences, check the
 Select box and click the
 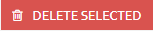 button.
- Verify the absences to be deleted, and click the
 button.

WARNING! Absences create entries in Hours Worked. If you delete an absence record, make sure the associated Hours record also gets deleted.
Add Hours
- Click the
.png) link from either the Input Absences screen or the Absence Details screen. The Add New Absences form will display.
link from either the Input Absences screen or the Absence Details screen. The Add New Absences form will display.
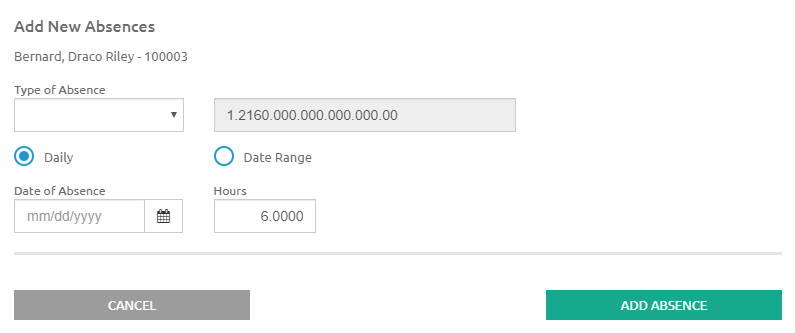
- Select an absence type from the Type of Absence drop-down list.
- The employee's account number is automatically populated.
- Select either Daily or Date Range.
- If Daily is selected, enter the Date of Absence.
- If Date Range is selected, enter or select a date range using the Calendar feature in the From and To fields.
- Enter the total number of absences in the Hours field.
-
- Always enter the actual number of absence hours for the job, even if the percent employed is other than 100%.
- If Date Rage is selected, on save, School LINQ will divide the Hours entered by the number of days entered to create the absences.
- Check the Add Substitute box if you want to add a Substitute to an absence.
- Click the
 link to choose a Substitute from the list.
 - Substitutes listed will be from the same pay group as the employee.
- The list will only include employees with jobs based on daily pay rate.
- The Sub Code Template defaults to the substitute’s budget code in the Account # field when adding an absence with a sub. You may still override the account as needed.
- A substitute can be split to multiple accounts even if the absentee is not, and vice versa, as long as the total % adds up to 100.
- When you edit an absence imported from AESOP, if the substitute’s account is not valid, the substitute’s rate and hours will not show until a valid account has been entered.
- The Substitute Hours will default to the absence hours for the employee in the Hours field.
- Example: If a Teacher is absent for two hours of their normal eight (8) hour day but are required to pay the sub for a ½ day, you will need to change the sub hours to 4.00 hours, otherwise the sub will be paid for two hours of an eight (8) hour day (¼ of a day).
- Click the
- Click the
 button when complete. The absence is added to the employee's grid.
©2021 | EMS LINQ, Inc.
School LINQ Help, updated 01/2021