Calculate Payroll
Calculate Payroll generates a list of all earnings and deductions calculated based on the employee jobs, employee deductions and input associated with the selected Pay Group and Pay Period.
This includes a list of all employees and the amount they will be paid during this payroll, along with all accounts and amounts associated with each item. Validations also take place during this process. A paycheck cannot be processed prior to Calculate Payroll being saved.
NOTE: In August 2019, the IRS released the new Federal W-4 for 2020. Starting January 1st, 2020, Calculate Payroll will use the new 2020 tax calculations.

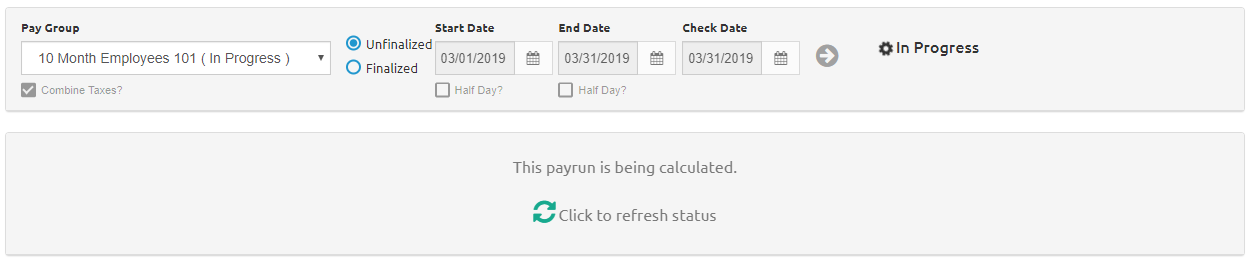
- Select a pay group from the Pay Group drop-down list.
- The Start Date will automatically populate based on the Pay Group selected.
- Enter or select the End Date, Check Date, and Cutoff Date using the Calendar feature.
- The Cutoff Date must be prior to the Check Date.
- If the Allow Lump Sum Worked Hours Entry check box is selected for the selected Pay Group in Pay Group Setup, the Cutoff Date field will not display.
- The
 button is split.
 - Click the main body of the button to begin Payroll Processing. A confirmation message will display.
- Click the arrow on the right-most area of the button and select Validate Accounts to run the Account Validation Report for the selected pay group.
When the Allow Lump Sum Worked Hours Entry check box is selected in Pay Group Setup, all hours are paid at the normal hourly rate for the employee job without incurring any system generated overtime.

- Click the
 button to continue processing payroll or the
 .png) button to return to the previous form.
button to return to the previous form.
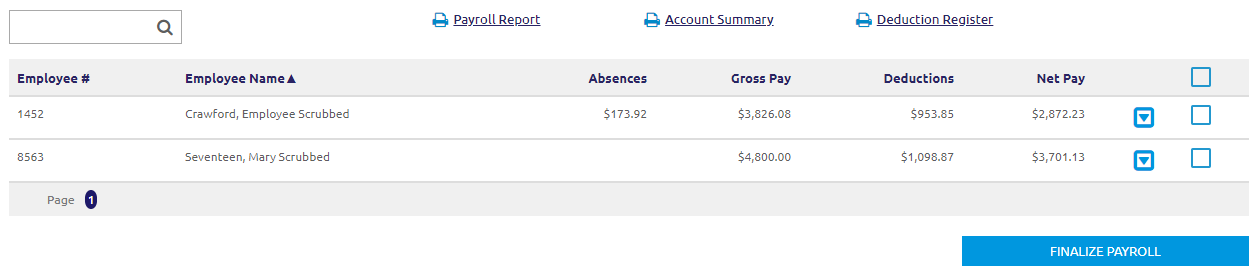
- All the employees with checks within that time period will display.
Search and Filter
- Enter an Employee # or Employee Name in the
 field to search for an employee.
 - Click the Employee #, Employee Name, Primary Site or Status column to filter.
- Click the
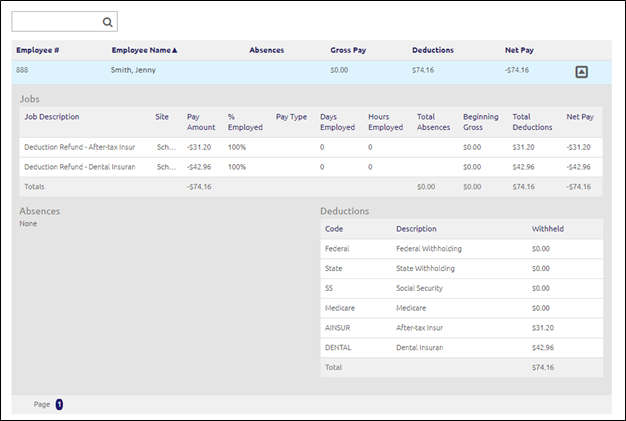
 icon for an employee to expand the check details.
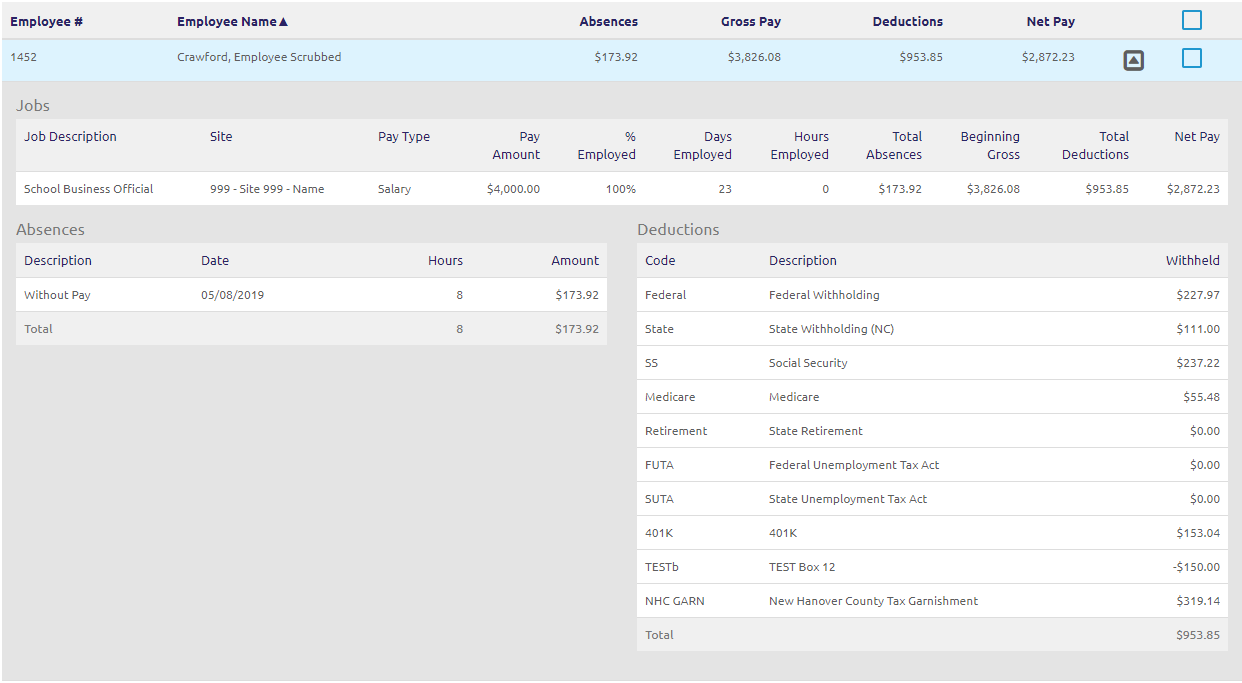
- This view displays three sections: Jobs, Absences and Deductions.
- Jobs displays the selected employee and the pay calculations for this pay period.
- Absences displays all the absences for the pay period, with or without pay deductions for the pay item selected.
- Deductions displays all the accounts and amounts for the Employee’s voluntary and mandatory deductions related to the pay item selected.
-
Users have easy access to Payroll Report, Account Summary, and Deduction Register Proforma Reports.
Finalize Payroll
- Click the
 button if the calculated payroll is correct. A validation will run before the payroll is saved. A Pay Run Complete message will display.
If payroll is not correct, go back to Payroll Input and make any necessary corrections. Then return to Calculate Payroll and recalculate.
- If unapproved hours exist in the pay period that is being saved, clicking No on the unapproved hours message will now provide a report showing the employee(s) that is causing the message.
After the validation, a message will display at the top if there are any validation errors, i.e., missing tax information or invalid account codes. Any errors need to be corrected before the payroll can be saved.

- Click the
 button to confirm finalizing payroll. You will be redirected to the Finalize Payroll screen.
Calculating Overtime Pay
Pursuant to FSLA, School LINQ calculates overtime in the following manner:
- All hours above the statutory level of 40 (absences not withstanding) are multiplied by the premium rate.
- Overtime / Comp Time uses the Employee Job’s FLSA setting to determine if the job is subject to overtime, comp time, or exempt.
- The work week is determined by using the Work Week Start Day and the Cutoff Dates.
- When the job is hourly, the rate is pulled from the applicable job table.
- When the job is a salary, it determines the hourly rate by dividing the salary amount by the days in a pay period and then dividing by the hours per day for that job.
- The Overtime Premium is ½ of the regular rate of pay, and is paid for any hour above 40 (excluding absences).
- In the event of two or more jobs, School LINQ calculates a blended rate of pay. It is calculated using the Hourly rate of Job A multiplied by the hours for Job A added to the Hourly rate of Job B multiplied by the hours for Job B divided by the total hours worked.
- When two or more jobs are involved, the total overtime dollars are prorated based upon that jobs percent of the total hours worked.
- When an employee has multiple jobs and goes into an overtime situation, if the FLSA settings differ between jobs, OVERTIME will be paid for all jobs.
- If Overtime is calculated, the Overtime Account template (in Job Setup) will be applied to the regular salary account to determine the account number to use when paying the overtime.
- The overtime amount for each week is added together with the regular pay and/or salary. References are:
- Bus Driver Overtime: when performing overtime calculation and the salary code "Object" part = 171, it will pay the Overtime out of Object 172 for NC users.
Removing a Pay Run
To calculate another pay run, the previous one (which was saved automatically) will need to be removed.

- Click the
 icon next to Saved. A Remove Pay Run? message will display.

- Click the
 button to clear the dates.
Recalculating a Pay Run after an Error
If the pay run contains an error, the pay run now will continue to calculate and save for review. The pay run will not be allowed to proceed to Finalize until the errors are cleared. The error information will be displayed on the screen, and at the end of the Payroll Reports. The pay run will display on the screen and reports as usual, so it can be reviewed.
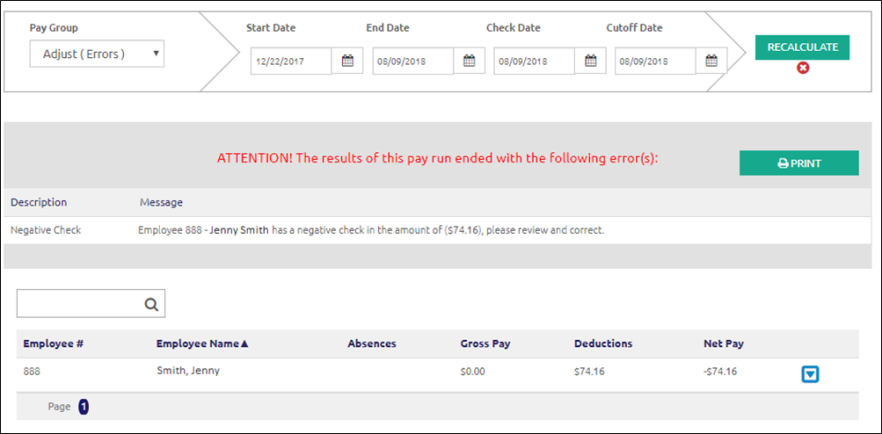
- Click the
.png) button to print a list of all the checks that need corrected. This is a handy way to keep track of the checks with errors without re-running payroll.
button to print a list of all the checks that need corrected. This is a handy way to keep track of the checks with errors without re-running payroll. - Click the icon to review the Error Check details.
- Any checks with errors will need to be corrected (such as the employee's Deductions or Tax/Compensation), or the Employee removed from the Pay Group before the Payroll can be calculated correctly.
- Example: In this image, the error was a negative check, which could be the result of a voluntary deduction that was more than the overall check amount. To correct this, go to the employee's Deductions Tab under Manage Employees and work with the deductions until the check was no longer a negative amount.
- When all corrections have been made, click the
 button.
- If all errors are corrected, Payroll can continue to Finalize Payroll.
- If errors persist, the errors will display like above. If you need assistance correcting any check errors, please call LINQ Support at 1-800-541-8999, option 2.
©2021 | EMS LINQ, Inc.
School LINQ Help, updated 01/2021