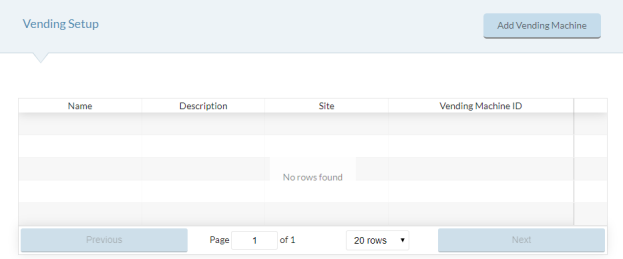
Vending Setup
Meals Plus allows you to sync your vending machines to Meals Plus Web, allowing students and teachers to use their Account Balance to purchase vending items. Students and teachers can now receive the same reduced pricing based on their eligibility when making Vending purchases.
NOTE: Vending Machine transactions are recorded along with the rest of a site’s Point-of Sale data.
-
Meals Plus Setup
Adding a Vending Machine
-
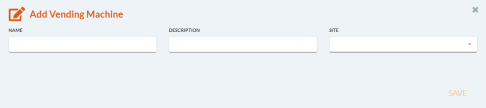
Click the Add Vending Machine button.
-
Enter a name for the machine in the Name field.
-
The Name will serve as the vending machine’s username.
-
The Name you enter is what will appear on reports with VM_ at the front of it. Example: If you name a machine ‘1Floor’, it will appear as VM_1Floor on reports.
-
NOTE: The Name can only be seven (7) characters long and not have any spaces.
-
-
Enter a brief description in the Description field.
-
Example: East Wing – 1st Floor
-
-
Select a Site from the dropdown menu.
-
Click the Save button.
-
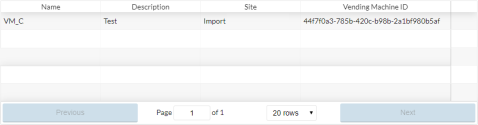
When you add a new Vending Machine, a Vending Machine ID will be automatically generated and shown in the Vending Setup grid.
-
The Vending Machine ID is what will link Meals Plus to VendNovation.
-
VendNovation Setup
-
Log in to you VendNovation account.

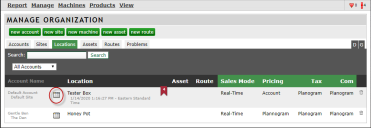
Creating a New Account
-
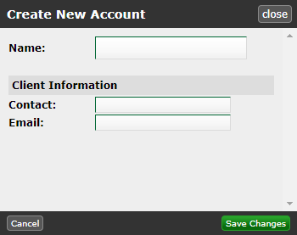
Click the New Account button.
-
Enter information for the following fields:
-
Name
-
Contact
-
Email
-
-
Click the Save Changes button.
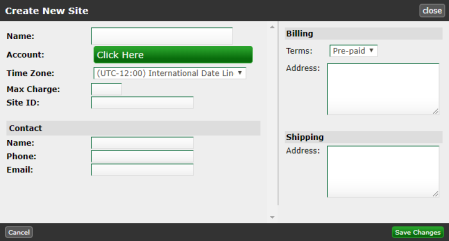
Adding a New Site
-
Click the New Site button.
-
Enter information for the following fields:
-
Name
-
Account
-
Time Zone
-
Max Charge: This is the maximum charge limit that can be set for vended items.
-
Site ID: Enter your District ID in this field.
-
This field must match your District ID in order to sync with Meals Plus.
-
-
Contact
-
Phone
-
Email
-
Billing Terms: Select an option from the dropdown menu.
-
Billing Address
-
Shipping Address
-
-
Click the Save Changes button.
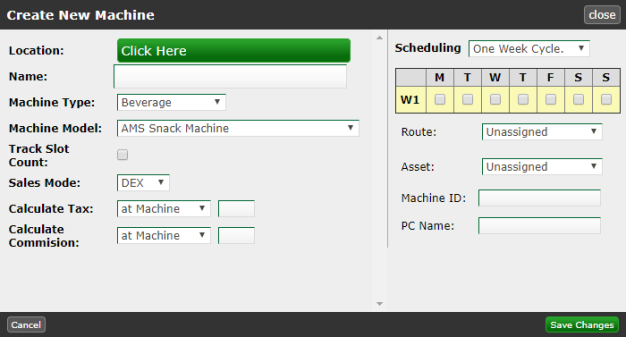
Adding a New Machine
-
Click the New Machine button.
-
Enter information for the following fields:
-
Select a Location by clicking the Click Here button.
-
Name
-
Select a Machine Type from the dropdown list.
-
Select VendNovation Controller from the dropdown list.
-
Check the Track Slot Count box.
-
If checked,
-
If unchecked,
-
-
Select a Sales Mode from the dropdown list.
-
Select how the Tax will be calculated and enter the amount/percentage:
-
at Machine
-
at Planogram
-
-
-
Select how the Commission will be calculated and enter the amount/percentage:
-
at Machine
-
at Planogram
-
-
Select a Scheduling Cycle from the dropdown list.
-
Check the boxes for the days of the week on the schedule.
-
Select a Route from the dropdown list.
-
Select an Asset from the dropdown list.
-
Enter the Vending Machine ID from Meals Plus in the Machine ID field.
-
This information must match the Vending Machine ID in Meals Plus in order to sync correctly.
-
-
Enter the PC Name.
-
Click the Save Changes button.
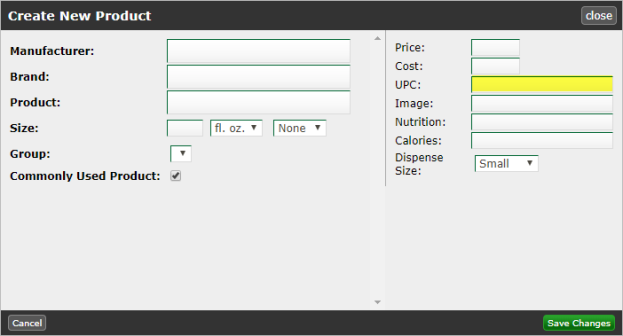
Adding a New Product
-
Click on the Products tab.
-
Click the New Product button.
-
Enter information for the following fields:
-
Manufacturer
-
Brand
-
Product
-
Size: Enter a size and then select the unit of measurement from the dropdown and list.
-
Group: Any Groups you have created will populate the dropdown list.
-
Commonly Used Product: This box will be checked by default.
-
Price: The price should match the base price of the product in Meals Plus.
-
Important Note about Tax: Vending transactions do not add the tax to a products price. The price entered will be the final amount.
-
You can include tax by adding it to the Price manually.
-
-
Meals Plus will overwrite the VendNovation price once a student has logged into a vending machine and selected an item. The price will then be reduced based on the student’s status.
-
NOTE: Items can be set with a price of $0.00 and vended once their Vending Item Number has been entered. If the item is vended without a student serving number, the transaction will not appear on the Transaction History Table.
-
-
Cost
-
UPC: Enter the Product ID from Meals Plus in this field. The UPC must match the Product ID to avoid transaction errors.
-
Image
-
Nutrition
-
Calories
-
Dispense Size: Select Small, Medium or Large from the dropdown list.
-
-
Click the Save Changes button.
Setting Up the Planogram
Items will be needed to added the Planogram in VendNovation before they are available to vend.
-
Click on the Machines page from the Machines dropdown list.
-
Click on the Planogram Icon.
-
You will need to define your machine’s motor range. Select numbers that match how your vending machine’s will be set up. Example: If you want to create a layout of five (5) rows and five (5) columns, the planogram layout may look like this:
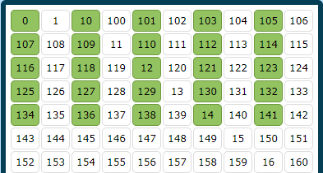
-
Click the Save Changes when you have completed setting up your layout.
Adding Items to the Planogram
-
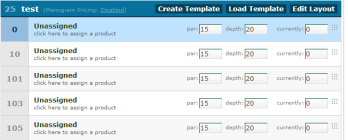
Click on an Unassigned item to assign a food item to that Planogram Number.
-
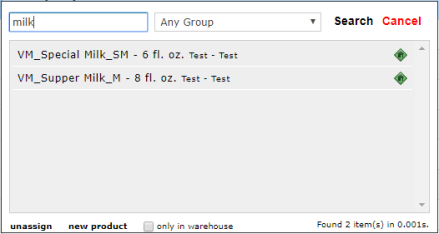
Enter the Item in the search field and click the Search button.
-
Select a food item from the result, the item will automatically be added onto the Planogram.
-
You can enter the Current (On-Hand) quantity.
-
Alerts can be setup when Par Levels are not met.
-
-
Click the Save Changes button when complete.
Making Changes to the Planogram
You can remove or swap out a spot on the Planogram in order to make room for new items in the Vending Machine.
-
From the Machine: Adjust Inventory Levels screen, select the item you are making changes to.
-
To remove the item, click the Unassign button, the item will go back to it’s original Unassigned status.
-
NOTE: The Currently count will not default back to zero (0) after unassigning an item from the slot.
-
-
You can swap out the item by searching for the new item and selecting it, the Planogram will update automatically with the new item.
-
Click the Save Changes button when complete.
©2021 EMS LINQ Inc.
Meals Plus Web Help, 1/2021