Add/Edit/View Item
This is where you set up and manage the list of items in your inventory.
Filter By
This displays an overview of Items. To get to the details, click View/Edit.
- Select to filter Items by Bid Price, Bid Group, Item Group, Account Category, Distributors, and/or Storage Location from the dropdown lists to filter options displayed on the grid.
- Select Active or Inactive Items.
- Click the Kitchen Item toggle button to only display Items that come from a Central Kitchen.
- Click the
 button to reset all filters to their default setting.
 - Click the arrow to minimize this section and making the grid larger.

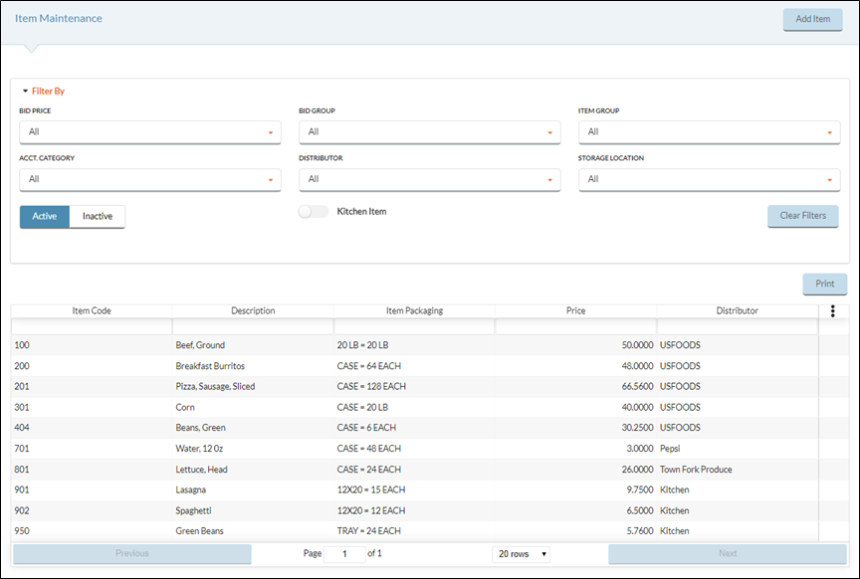
GRID FEATURES
The prices, packaging, and distributor information are all listed by Bid Dates.
-
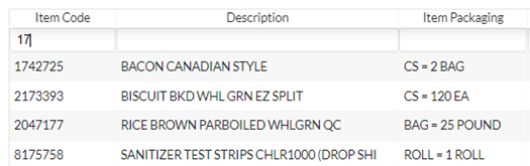
Click any column heading to sort that column in ascending or descending order, or type in the field under the Header Name to filter the results of that column.
- Click the
 button to print the list of Inventory Items in the grid.
 - Click the
 button for additional features.
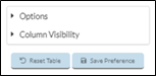
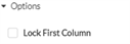
Options
- Click the arrow to expand Options.
- Check the Lock First Column box if you always want the first column to display when scrolling in the grid.
- Check the Lock First Column box if you always want the first column to display when scrolling in the grid.
Column Visibility
The Items grid is fully customizable for each user since they can decide on what and where Preferences/Columns display.
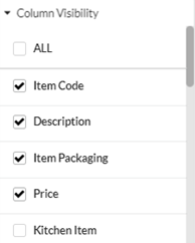
- To display all of the columns in the grid, check the All box.
- Or, check the boxes of the Preferences/Columns you want displayed in the grid.
- Default Preferences/Columns:
- Item Code
- Description
- Item Packaging
- Price
- Kitchen Item
- Distributor
- Optional Preferences/Columns are:
- Item Group
- Alternate Item
- Account Category
- Bid Group
- Tax Group
- Distributor Item
- Brand
- UPC
- GTIN
- Begin Date
- End Date
- Servings Per Purchase Unit
- Menu Costing
- Order Preference
- Storage Location
- Minimum Par Level
- Maximum Par Level
- Truck Route
- Default Preferences/Columns:
- The user can re-arrange the order of the Preferences/Columns by dragging and dropping the column from its old location to its new location.
Reset Table
- Click the Reset Table button to set the grid to the default settings.
Save Preferences
- Click the Save Preferences if you want to save all of the changes you to the grid layout.
ADD ITEM
- Click the
 button to create a new Item.
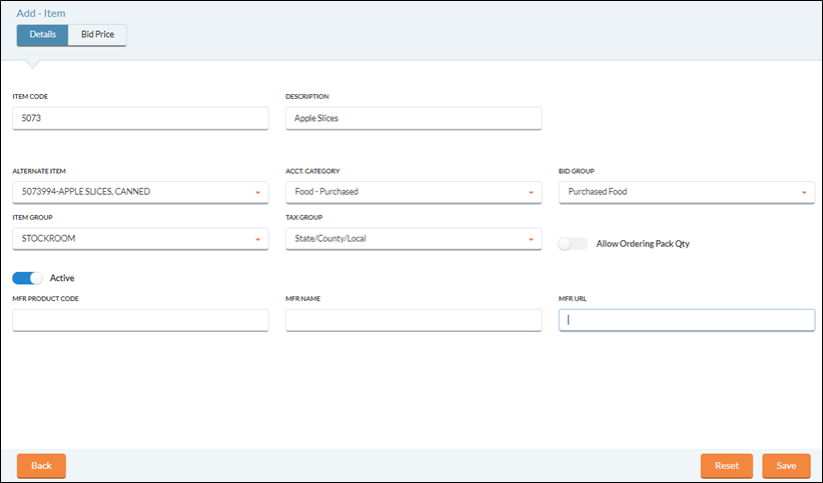
Details Tab
-
Enter a unique Item Code (up to nine characters and can include numbers/letters) to identify this Item in the Item Code text field. No specific numbering pattern is required.
- An Item Code cannot be edited after the Item has been saved.
- Enter a Description for the item in the Description field.
- This is required but it can be edited later.
- Select an Alternate Item from the Alternate Item dropdown list if needed.
This is used with Warehouse Orders. If an Item is ordered by a school and is not available in the first warehouse listed on the Warehouse/Kitchen tab in Site Setup, the Alternate Item will be shipped instead if it is available in the warehouse. If neither Item is available, it will order the original item directly from the Distributor.
- Select an Account Category from the Account Category dropdown list.
- Account Categories are used to link Items that have the same expense code and is required.
 You can add new Categories and Groups at any time. Please refer to those sections under Inventory: Administration.
-
Select a Bid Group from the Bid Group dropdown list, if needed.
- Bid Groups are used to group items for bidding purposes.
- Select an Item Group from the Item Group dropdown list, if needed.
- Item Groups are used to group items for special purposes.
-
If this Item is taxable, select the Tax Group that applies from the Tax Group dropdown list. Leave it blank if no tax applies. Tax information is used with Purchase Orders and Invoice Accrual.
-
Check the Allow Ordering Pack Quantity box if the Secondary Unit can be ordered from the Distributor. If unchecked, only Primary units can be ordered.
- Click the Active toggle button to make an Item Inactive. Active is the default.
- Enter a manufacturer's product code in the MFR Product Code field, if needed.
Pricing Tab
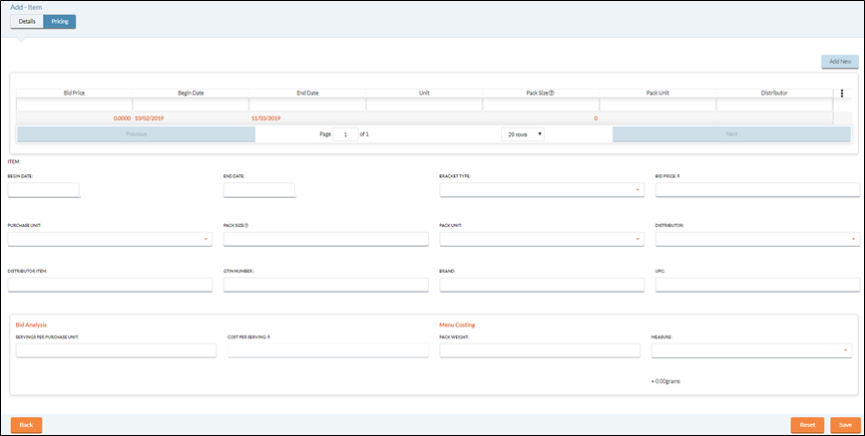
- Select a Begin and End Date.
- These will create a Bid Price Range for the new item.
- Select a Bracket Type from the dropdown list.
- None, Dollars, Weight or Quantity.
- Enter the cost in the Bid Price field.
- Select the Purchase Unit from the dropdown list.
- This is the unit the item is shipped in.
- Enter the number of units in the Pack Size field.
- This is the number of pack units in a Purchase Unit.
- Select the Pack Unit from the dropdown list.
- Select the Distributor from the dropdown list.
- Enter information in the Distributor Item field, if needed.
- Enter the GTIN Number, if needed.
- Enter the Brand, if needed.
- Enter the UPC, if needed.
Bid Analysis
- You can enter the Servings Per Purchase Unit and Cost Per Serving, if needed.
Menu Costing
- You can enter the Pack Weight and select the Measure from the dropdown list, if needed.
- Click the Save button.
©2021 EMS LINQ Inc.
Meals Plus Web Help, 10/2019