Physicals
Physicals are used to create a record of the physical item count after an inventory period (usually monthly).
CREATING A NEW PHYSICAL
- Click the
 button to create a new Physical.
- Select the Physical Date (the only date option for Physicals is the last day of the month selected.)
- Select the location the Physical was recorded at under the Site dropdown list.
- Enter any relevant information in the Comments field if needed.
Enter the amount of the inventoried product under Purchase Qty and Pack Qty for all On Hand quantities. Example: You have 1.5 cases of hot dogs and there are 24 hot dogs in one case. Under Purchase Qty you would enter and under Pack Qty you would enter 12.
- NOTE: Entering a whole number with a decimal in either field will not convert the final number when saving unless the individual amount is entered under the Pack Qty field as a whole number. Example: Entering in 1.5 cases of hotdogs will stay as 1.5 under both Purchase Qty and Pack Qty. If you enter the total amount of hotdogs under the Pack Qty field, it will convert within Meals Plus and display 1 case and 12 each.
To remove an Item from a Physical you can either change the quantity to zero or use the minus button to remove the item from the grid.
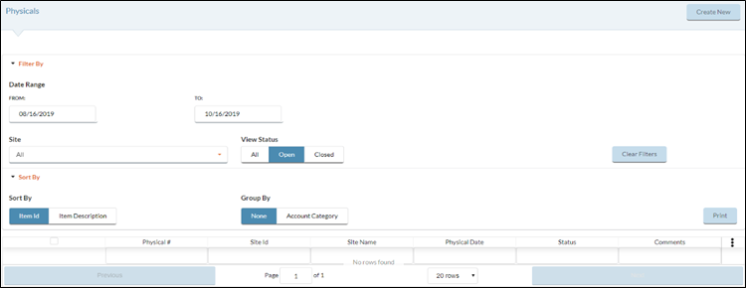
FILTERING PHYSICALS
You can change the Physicals that appear on the grid by selecting the following Filter By options:
- Select a Date Range.
- Select a Site from the dropdown list.
- Select a View Status.
- Click the All button to display all Physicals on the grid.
- Click the Open button to display Open Physicals on the grid.
- Click the Closed button to display Closed Physicals on the grid.
CLOSING A PHYSICAL
When you close a Physical it updates the On Hand quantities in your inventory and automatically updates if the On Hand quantities differ from the Physical quantities.
 You may not have access to the Close Physical option, depending on your User Role Access permissions. You can view your User Role Access permissions by navigating to Administration: System Settings: User Role Access: Inventory and ensure the Close Physicals field is enabled.
- Click the Preview Physical Items button to review changes you have made.
- From the preview page you can:
- Click the Previous Page button to return to the previous page in order to make additional edits.
- Click the Save Only button if you want to save changes made to the Physical (use this save option to enter information and save your progress.)
- Click the Save Update On Hand and Close button if you are finished creating the Physical.
- Click the Cancel button to return to the previous form and cancel any changes.
- From the preview page you can:
PRINTING PHYSICALS

- Click the box to select the Physical you want to print.
- You can sort how the Items are organized to be printed by selecting one of the following Sort By options:
- Select Item Id to arrange Items numerically based on their Item Code.
- Select Item Description to organize the Items alphabetically based on their Item Description.
- Select None or Account Category from the Group By section.
- Select Account Category to group Items that are in the same Account Category to print a subtotal for each category. If an Item is not assigned to Account Category it will be listed as Undefined
- Click the Print button to print your selection.
©2021 EMS LINQ Inc.
Meals Plus Web Help, 10/2019