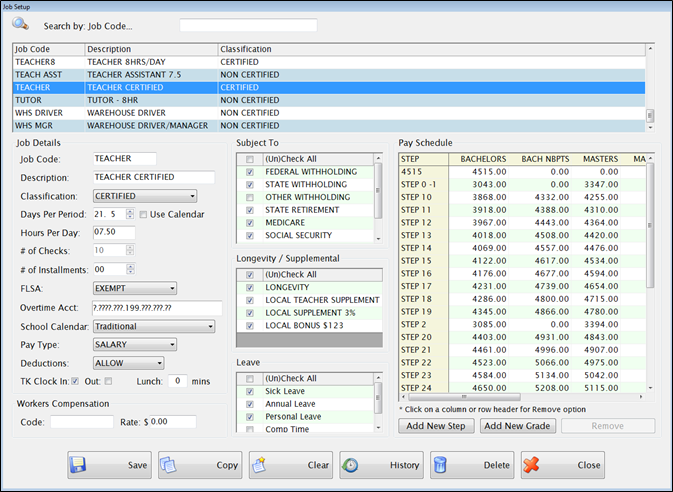
This is where the jobs, grades and their associated pay schedules are defined for your district.
Job Setup allows you to set up each job once, and then assign any number of employees to it. You do not have to enter all the basic job information repeatedly for every employee. Any number of employees can be assigned to the same Job and a single Job can have any number of pay grades and steps.
When a Job (from Job Setup) is associated with a specific employee, the Job’s settings will be applied automatically to the Employee Job.
A few of the Job settings can be modified at the Manage Employees: Employee Job level for any individual employee assigned to it. They include:
School Calendar
Allow Deductions
Subject To
Leave
Example: If a Job normally is set to Allow Deductions, an individual employee’s job can still be set to not allow deductions.
A few Job settings cannot be modified on the Employee Job; if they need to be changed, a new job will need to be set up. They include:
Job Code
Description
Classification
Calendar
Days per Month
Hours Per Day
Number of Checks
Pay Type
Pay Schedule amounts
Example: if Job A has Salary Pay Type, 21.5 Days Per Month and eight (8) Hours Per Day: All the individual employees with Job A must be Salary Pay Type, 21.5 Days and eight (8) Hours Per Day because these are determined by the Job settings. But if they need to be assigned to different Calendars, Subject To (for taxes) or Leave Types, you can use the same Job because these settings can be modified at the employee level through the Employee Job tab.
Complete the following form to add a job:
This grid is where existing jobs are displayed in alphabetical order; however, it can be re-sorted by clicking any column in the grid.
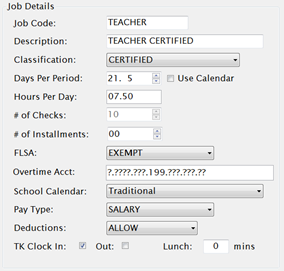
Enter a short description for this job in the Job Code field.
Enter the full description for this job in the Description field. This must be unique. This description appears in Timekeeper to determine which job an employee is clocking in/out for and prints on the employee’s paystub.
Select Certified or Non Certified from the Classification dropdown list.
To enter the normal number of days worked in a calendar month, select the days with the arrow keys in the Days Per Period field or select Use Calendar. When deciding which method to use, remember the following:
To enter the usual number of hours worked in a day, enter the hours in the Hours Per Day field. Enter minutes as decimal values (7 hours 30 minutes = 7.5 hours). Hours Per Day is used for the following:
Select the normal number of checks this job gets in a year in the # of Checks selector. Do not include number of Escrow (Installment) paychecks received for the job. For teachers, the normal number of checks would usually be ten (10) checks per year. Non-teaching salary employees may receive ten (10) or 12 monthly checks per year or bi-monthly checks depending on how your unit is set up. If some of the employees receive ten (10) and the others get 12, two separate jobs need to be set up. This is used in combination with the Pay Schedule to calculate the annual pay when calculating taxes.
Enter the number of installments checks this job receives in the # of Installments field. Calculate Payroll now uses the # of installment checks to determine the amount of escrow to accrue during a regular pay period.
Select Overtime, Exempt or Comp Time from the FLSA dropdown list. This may be modified in Employee Job on an individual basis as needed.
Select Salary, Hourly, or Daily (for Substitute Teachers) from Pay Type dropdown list.
Select Allow or None from the Deductions dropdown list. This determines whether voluntary deductions will be taken from this job’s pay.
Check the TK Clock In and Out boxes if this job’s employees are required to clock in and out.
Enter the length of this job’s employees lunch period in the Lunch field if you want Timekeeper to automatically deduct this value from their hours worked per day.
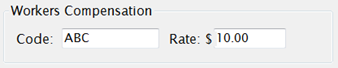
These fields are used to populate the Workers Compensation Spreadsheet. This is optional and for user-defined reporting purposes only.
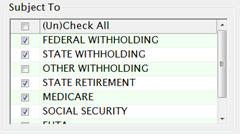
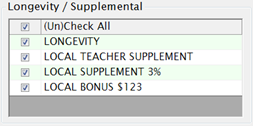
SUBJECT TO
These checkboxes determine how the job is taxed.
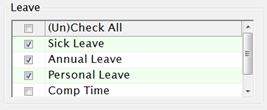
Check the Leave Types that usually apply to this job.
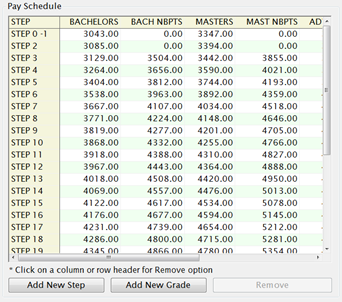
Step (row) = usually would be one step for each service year
Grade (column) = Credentials
Click
the
 button
to save the entered Job information.
button
to save the entered Job information.
A new screen will appear once Save is clicked.
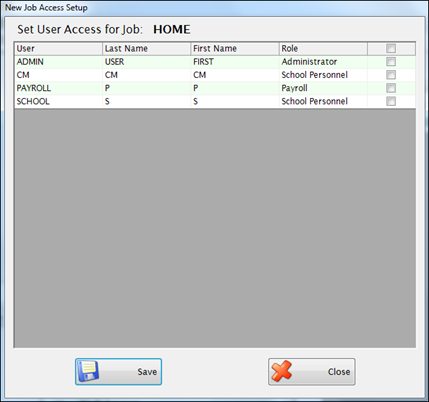
Select the Users that will have access to the new job by checking on the right.
Click the 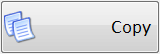 button to duplicate all data from the currently selected Job. The user will need to enter a new job code and description prior to saving a copied job.
Click the 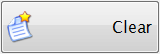 button to clear the form to enter a new job.
Click the 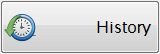 button to view an audit of all changes made to the selected job.
Click the 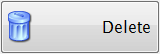 button to delete the highlighted Job.
Click the  button to exit out of the screen.
©2019 EMS LINQ, Inc.
Payroll, revised 04/2019