Receipts
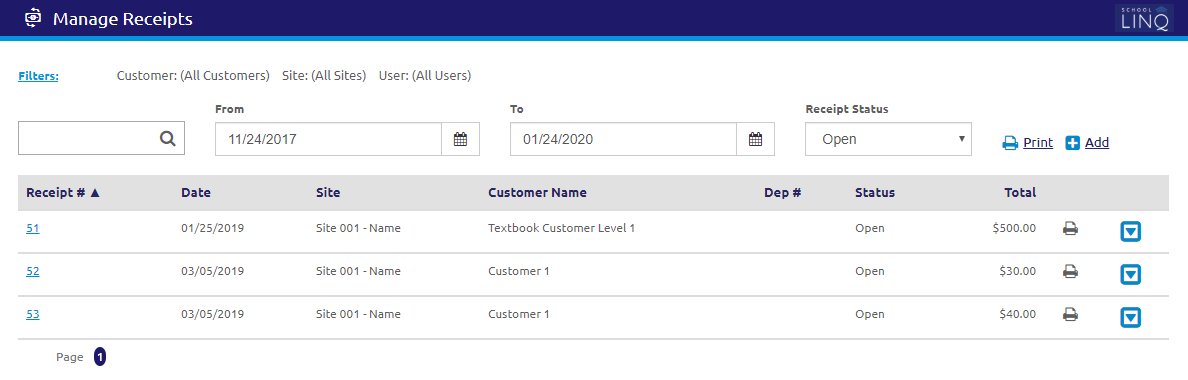
Manage Receipts allows users to enter money received for deposit as receipts from a customer.
Add / Edit Filters
- Click the
 link. The Add / Edit Filters form will display.
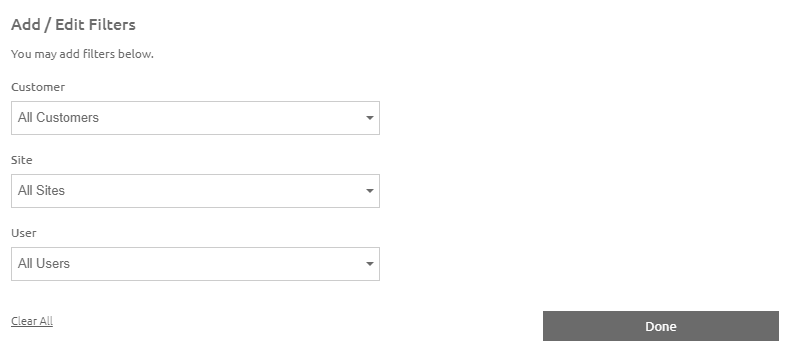
- Select a customer from the Customer drop-down list.
- Select a site from the Site drop-down list.
- Select a user from the User drop-down list. The grid will refresh on the next form.
- Click the
.png) button.
button.
Search and Edit
- Enter a Receipt # or Customer Name in the
 field to search for a receipt.
 - Enter or select a date range using the Calendar feature in the From and To fields.
- Select a status from the Receipt Status drop-down list.
- The Status column lists the receipt status:
- Open receipts have been saved but not deposited and can still be edited.
- Closed receipts have already been processed in Deposits and are read-only on this screen.
- Voided receipts have been voided and payment has been returned to the customer.
- To view or edit an existing receipt, click the
 icon.
icon.

- Click the
 button to edit a receipt, or click the link in the Receipt # column. The Edit / View Receipt form will display.
 - Click the
 link to delete a receipt. You can only delete open receipts.
 - Click the
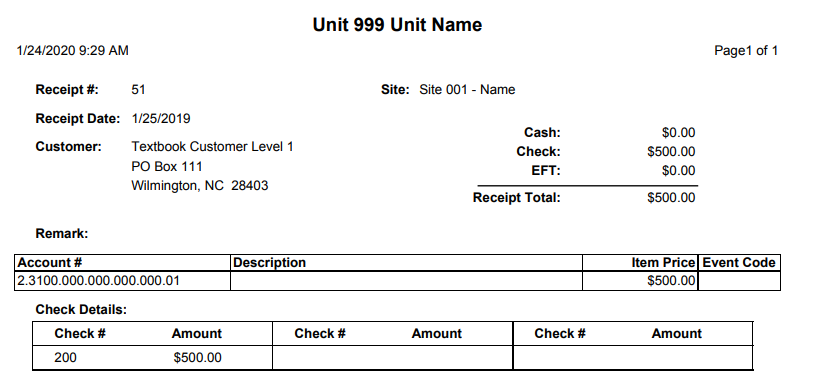
 icon to print a copy of the receipt you can give to the customer.
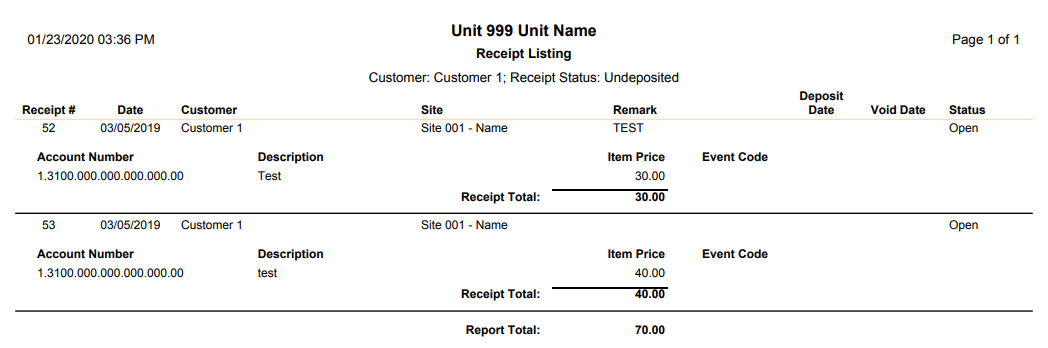
Print Receipt Listing Report
- Click the
 link to generate a Receipt Listing Report with all the receipts currently displayed in the grid.
Create New Receipt
- Click the
.png) link. The Create New Receipt form will display.
link. The Create New Receipt form will display.
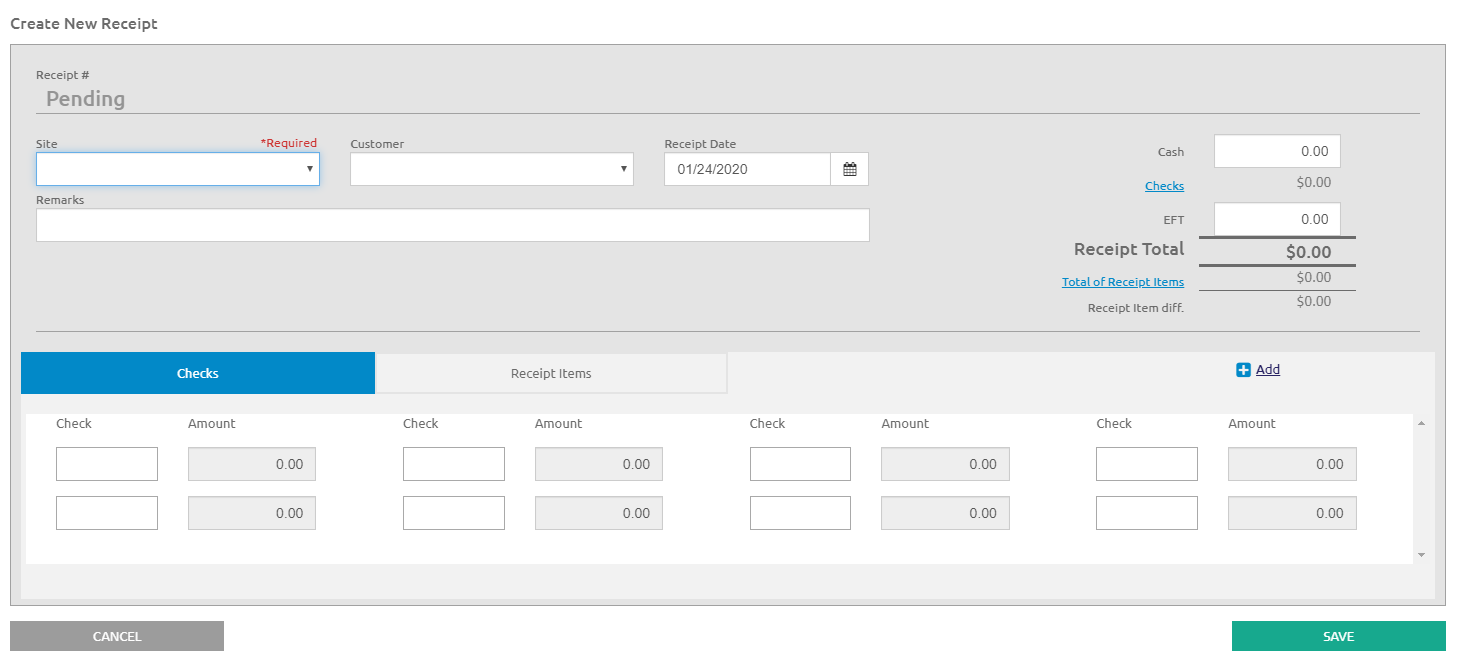
- Select the site for this Receipt from the Site drop-down list.
- Select the customer from the Customer drop-down list.
- Enter or select the Receipt Date using the Calendar feature.
- Enter a remark in the Remarks field. This is optional.
- Enter the amount of cash received in the Cash field.
- The Checks amount is calculated from the checks entered on the Checks Tab.
- Enter the amount of the EFT if this receipt was for an electronic fund transfer. EFT cannot be combined with a cash or check receipt. If cash or check is entered, then EFT is grayed out.
- The Receipt Total is the total of all cash and checks or the EFT total.
- The Total of Receipt Items is the total of the amounts entered on the Receipt Items Tab. The Receipt Total and the Receipt Items total must balance before the receipt will save.
Receipt Checks Detail Tab

-
Enter the Check and Amount for each check. Check can be a check number or a name.
-
Click the
link once for every additional check you wish to add. -
As check amounts are added to this tab, the Checks amount will update and add to the Receipt Total.
Receipt Items Tab

- Select an Invoice # from the drop-down list if this receipt is associated with an A/R Invoice.
- Enter the account number to post the receipt to in the Account # field or click the
 icon to search for an account. Do not select a cash account.
 - Enter the description in the Description field, if desired.
- Select an event from the Event drop-down list if this receipt should be reported on an event.
- Enter the Amount for each receipt item.
- Click the
 button. The Receipt Total and the Receipt Items total must balance before the receipt will save.
©2021 | EMS LINQ, Inc.
School LINQ Help, updated 01/2021