The Control File contains information that applies to the entire Fund Management accounting system.
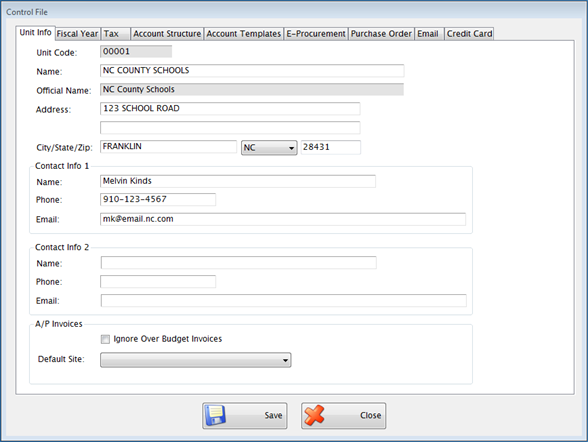
The Unit Code and Official Name, which is the legal name that goes on W2s and other official documents, are established in System Administration: Administration: License and cannot be edited here.
Enter the name of the school district in the Name field.
Enter the address for the school district in the Address field.
Enter the name, phone number and email address for up to (2) two school officials in the Contact Info 1 and 2 fields, if desired.
A/P Invoices
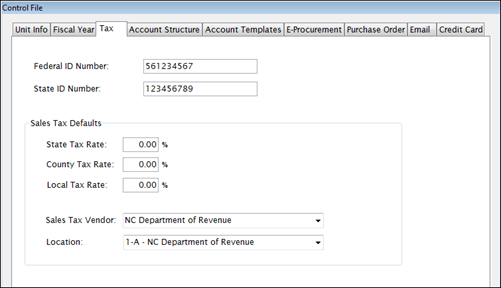
Enter the rates to be used as default values when a new vendor location is added in the State, County, and Local Tax Rates fields. (You will still be able to change them for specific locations if necessary.)
 NOTE: If
you have not set up your Vendor yet(Admin: Vendor
Setup),leave
the Sales Tax Vendor field blank and fill it in later.
NOTE: If
you have not set up your Vendor yet(Admin: Vendor
Setup),leave
the Sales Tax Vendor field blank and fill it in later.
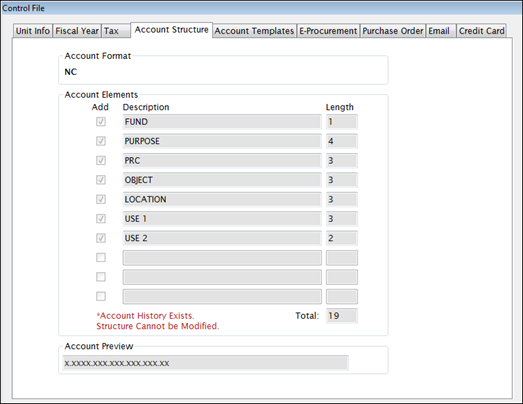
This sets up the account elements and lengths. It cannot be changed if any account history exists.
This screen allows you to set up templates that are used when new accounts are added.
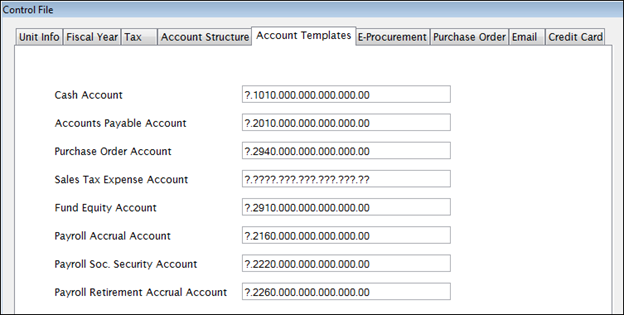
You can always override the default values if there are exceptions to the standard.
The templates can be changed at any time but changes will not affect existing accounts.

Enter the Entity Code in the Entity Code field.
Enter the County Code in the County Code field.
Enter the code that this will be billed to in the Bill To Code field.
Select the User Account for the Finance Officer from the User Account dropdown list.
The Finance Officer’s name will be automatically filled in once the user account is selected. It is not editable from this form.
Enter the Finance Officer’s email address in the Email field.
Select the User Account for the Purchasing Agent from the User Account dropdown list.
The Purchasing Agent’s Name will be automatically filled in once the user account is selected. It is not editable from this form.
Enter the Purchasing Agent’s email address in the Email field.
Check the Update EP Fields Only box to only update the e-Procurement when a vendor is imported in.
This screen controls the way your Requisitions and Purchase Orders are printed.
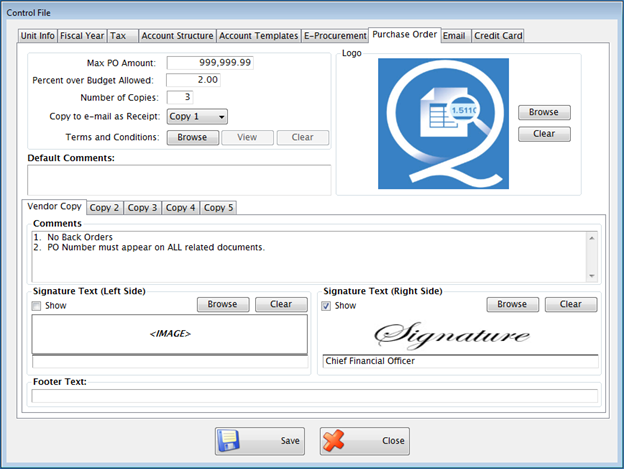
Enter Comments to customize each copy of the Purchase Order.
Enter footer text in the Footer Text field for Copies 2-5 only .
Click Browse to add images for printing logos and signatures on Purchase Orders. This section is optional.
You can choose which signatures to show on each copy or none at all.
You can also specify Signature Titles for each copy of your PO.
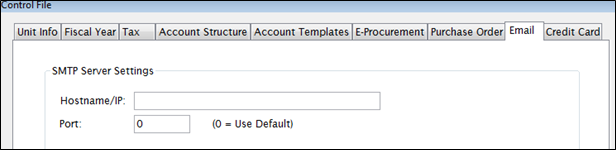
Enter the Server Settings required by your district for internal email. If you need assistance with the information in this section, please contact the Network Support Helpdesk for your district.
The Credit Card Tab is for clients who use Commerce Bank for processing payment of invoices by credit card. This information allows users to input, pay and export credit card invoices.
NOTE: A special vendor (“LEA name here”) specific to credit card processing should be added to Administration: Vendor Setup. This vendor should NOT be marked as ‘Credit Card Payment’ payment option.
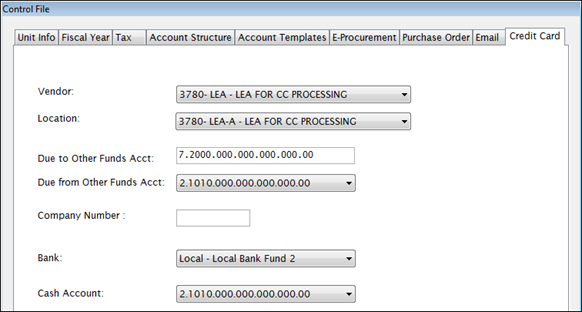
Select the LEA Vendor from the Vendor dropdown list.
Enter an account number in the Due From Other Funds Acct field.
Select an accompanying account number from the Due to Other Funds Acct dropdown list.
Enter a Company Number assigned by Commerce Bank.
Select a bank from the Bank dropdown list.
Select a cash account from the Cash Account dropdown list.
NOTE:This is a one-time setup and must be completely set up before an invoice can be added for a credit card vendor. Once there are open/unpaid Credit Card invoices, some fields become locked. Those fields cannot be changed until all Credit Card invoices are paid or deleted. This is done to prevent errant accounting.
©2019 EMS LINQ, Inc.
Fund Management, revised 03/2019